2019-12-11
Hugo で作成したブログの各記事内に Lamnda と S3 を使って はてなブックマークのブクマ件数を表示させてみた
Hugo で作成したブログの各記事内に、はてなブックマークのブクマ件数を表示させてみました。
はてなブログ (そもそも同じはてなのサービスなので) とか WordPress とかだとブクマ件数を表示されていることが多いですが静的サイトではあまり見ないので、多少無理がありますがやってみました。
目次
前置き
これは 静的サイトジェネレーター Advent Calendar 2019 - Qiita 11 日目のエントリです。
空いていたので滑り込みで入れさせてもらいました。
前提
ブクマ件数の表示には AWS の各種サービス (Lambda, S3, CloudWatch Events) を利用します。が、なるべく料金が発生しないような形で利用します。
また、対象となる Hugo のサイトも AWS 上で運用している前提で書きます。
概要
はてなブックマークには、特定の URL に付いているブクマ件数を取得する API が提供されています。
この API を利用して各記事のブクマ件数を取得し、その値を記事内に表示します。単純ですね。
なお、 API の利用に関しては、はてなの利用規約を参照ください。
実際の流れ
実際にブクマ件数の取得から表示までの流れは、下記のようになります。
- ブクマ件数を取得して値を保存する Lambda を定期的に実行する
- 各記事内で保存されたブクマ件数を取得する (JavaScript)
シンプルですね。
ただ、 Hugo は静的サイトなので、既に生成された html や sitemap.xml 等を使って上記のことを実現する必要があるので、それが今回のポイントです。
では、各フェーズについて詳しく見ていきます。
1. ブクマ件数を取得して値を保存する Lambda を定期的に実行する
まずは各記事のブクマ件数を取得して、その値を保存する Lambda を作成します。
値は、 json ファイルにして S3 に保存します。 Dynamo DB や RDS はコストやアーキテクチャの面から考えて利用しません。
ブクマ件数を取得する対象の記事 URL は、当たり前ですが新しく記事を追加するたびに増えます。その度にブクマ件数取得対象 URL を増やしているとキリがないので、取得対象の記事 URL は sitemap.xml から取得します。
sitemap.xml には各記事の URL 以外に、タグ別ページやプロフィールページも含まれています。
今回取得したいのは各記事のブクマ件数のみなので、対象は /post/* の URL のみになります。
ちなみに Hugo で生成される sitemap.xml は下記のようになっています。
<?xml version="1.0" encoding="utf-8" standalone="yes" ?>
<urlset xmlns="http://www.sitemaps.org/schemas/sitemap/0.9"
  xmlns:xhtml="http://www.w3.org/1999/xhtml">

  <url>
    <loc>https://michimani.net/post/aws-auto-start-stop-ec2-stack-using-cdk/</loc>
    <lastmod>2019-08-07T12:58:46+09:00</lastmod>
  </url>

  <url>
    <loc>https://michimani.net/post/aws-service-terms-for-using-beta-services/</loc>
    <lastmod>2019-08-05T11:07:58+09:00</lastmod>
  </url>

  ...

  <url>
    <loc>https://michimani.net/</loc>
    <lastmod>2019-08-19T18:16:11+09:00</lastmod>
    <priority>0</priority>
  </url>

  <url>
    <loc>https://michimani.net/about/</loc>
  </url>

  <url>
    <loc>https://michimani.net/contact/</loc>
  </url>

</urlset>
ブクマ件数を取得するためには、件数取得 API https://bookmark.hatenaapis.com/count/entry に、クエリパラメータ url として件数を取得したい URL を指定し、 GET リクエストを送ることで取得できます。
例えば https://michimani.net/post/aws-auto-start-stop-ec2-stack-using-cdk/ のブクマ数を取得したい場合は下記のようになります。
$ http "https://bookmark.hatenaapis.com/count/entry?url=https://michimani.net/post/aws-auto-start-stop-ec2-stack-using-cdk/"
HTTP/1.1 200 OK
Cache-Control: public, max-age=3600, s-maxage=3600
Connection: keep-alive
Content-Length: 2
Content-Type: text/plain
Date: Tue, 10 Dec 2019 12:50:26 GMT
Server: nginx
Via: 1.1 3c0190220d7b3ab896def13f86f295aa.cloudfront.net (CloudFront)
X-Amz-Cf-Id: 7cPpfmH9vUlgPcZUeNZ-7mXmdxOWExJik_q5h8Dsq1FwdbgBXx7BOQ==
X-Amz-Cf-Pop: NRT20-C1
X-Cache: Miss from cloudfront

31
シンプルにブクマ件数のみが返ってきます。
ちなみに上のコマンドで使っている httpie は curl に代わる便利なコマンドです。ぜひ使ってみてください。
このようにして取得したブクマ件数を、下記のような json ファイルとして S3 に保存します。
{"cnt": 31}ファイル名は、各記事が特定できるように /post/ 以降の文字列とします。
この例だと aws-auto-start-stop-ec2-stack-using-cdk.json とします。
オブジェクトのキー名としては /data/htbcnt/aws-auto-start-stop-ec2-stack-using-cdk.json としています。こうすることで、 https://michimani.net/data/htbcnt/aws-auto-start-stop-ec2-stack-using-cdk.json でアクセスできるようになります。
この 取得 -> S3 へ保存 を、 sitemap.xml から取得した記事の数だけ実行します。
なぜ各記事ごとに json ファイルを作成するかというと、後に各記事からこの json ファイルを参照する JavaScript を記述するのですが、その時にロードするファイルサイズを減らすためです。
1 つの json ファイル内に各記事のブクマ数を保持することもできますが、記事数が増えてくるとファイルサイズも増えるので、このような形にしています。
ということで、実際に実行している Lamnda (Python 3.7) は下記のようになります。
(gist に置いてます Get share count in Hatena Bookmark of each of posts in Hugo site, and save it as json files on S3.)
from time import sleep
import boto3
import json
import logging
import re
import traceback
import urllib.parse
import urllib.request
import xml.etree.ElementTree as ET

HATEBU_CNT_API = 'https://bookmark.hatenaapis.com/count/entry?url='
S3_BUCKET = '<your-s3-bucket-name>'
SITE_MAP_KEY = 'sitemap.xml'
HUGO_HOST = '<your-hugo-site-host>' # eg) https://michimani.net

s3 = boto3.resource('s3')
logger = logging.getLogger()
logger.setLevel(logging.INFO)


def get_hatebu_count(post_url):
    count = 0
    hatebu_url = HATEBU_CNT_API + urllib.parse.quote(post_url)
    try:
        with urllib.request.urlopen(hatebu_url) as res:
            count = int(res.read())
    except Exception as e:
        logger.error('Hatebu count request failed: %s', traceback.format_exc())

    return count


def get_post_url_list():
    post_url_list = []

    try:
        s3_object = s3.Object(bucket_name=S3_BUCKET, key=SITE_MAP_KEY)
        sitemap = s3_object.get()['Body'].read().decode('utf-8')
        xml_root = ET.fromstring(sitemap)
        ns = {'post': 'http://www.sitemaps.org/schemas/sitemap/0.9'}
        reg = re.compile('^' + re.escape(HUGO_HOST + '/post/') + '.+')
        for url_part in xml_root.findall('post:url/post:loc', ns):
            if reg.match(url_part.text):
                post_url_list.append(url_part.text)
    except Exception as e:
        logger.error('Get post url failed: %s', traceback.format_exc())

    return post_url_list


def put_hatebu_count_file(post_url, hatebu_count):
    try:
        object_key = get_key_from_post_url(post_url)
        s3obj = s3.Object(S3_BUCKET, object_key)
        data = json.dumps({'cnt': hatebu_count}, ensure_ascii=False)
        s3obj.put(Body=data)
    except Exception as e:
        logger.error('Put count data failed: %s', traceback.format_exc())


def get_key_from_post_url(post_url):
    return 'data/htbcnt/{post_key}.json'.format(
        post_key=post_url.replace(HUGO_HOST + '/post/', '').replace('/', ''))


def count_needs_update(post_url, new_count):
    res = False
    try:
        object_key = get_key_from_post_url(post_url)
        cnt_data_obj = s3.Object(bucket_name=S3_BUCKET, key=object_key)
        cnt_data_raw = cnt_data_obj.get()["Body"].read().decode("utf-8")
        cnt_data = json.loads(cnt_data_raw)

        if new_count > cnt_data['cnt']:
            res = True
    except Exception:
        print('Hatebu count file does not exists.')
        res = True

    return res


def lambda_handler(event, context):
    post_list = get_post_url_list()
    for post_url in post_list:
        sleep(0.5)
        count = get_hatebu_count(post_url)
        if count_needs_update(post_url, count) is True:
            put_hatebu_count_file(post_url, count)
            logger.info('Updated for "{}", new Hatebu count is "{}"'.format(post_url, count))
        else:
            logger.info('No update requred for "{}"'.format(post_url))
これを、 CloudWatch Events のスケジュールで定期実行します。
定期実行の間隔については適当ですが、このブログだとほぼブクマは付かないので、日本時間の 6:00 〜 24:00 の間に 15 分間隔で実行しています。これでも多い気がしますが…。
そのときの cron 式は 0/15 0-13,21-23 * * ? * となります。 CloudWatch Events のスケジュールで cron 式を指定する場合はのタイムゾーンは UTC になるので注意です。
これでブクマ件数の取得と保存ができました。
2. 各記事内で保存されたブクマ件数を取得する (JavaScript)
続いては、保存したブクマ数を各記事内から取得します。
JavaScript で取得するのですが、記述するのは各テーマの下にある single.html です。このブログでは indigo のテーマを使用しているので、 ./themes/indigo/layouts/_default/single.html に処理を追加します。
実際には下記の記述を、 single.html の一番下に追加します。
<script>
  showHatebuCount();

  function showHatebuCount() {
      const postKey = location.pathname.replace('/post/', '').replace('/', '');
      const htbCntData = `/data/htbcnt/${postKey}.json`;
      fetch (htbCntData).then(res => {
          const hatebuBadgeElm = document.getElementById('hatebu-count-badge');
          if (res.ok) {
              res.json().then(cntData => {
                  hatebuBadgeElm.innerText = cntData.cnt;
              });
          }
      });
  }
</script>
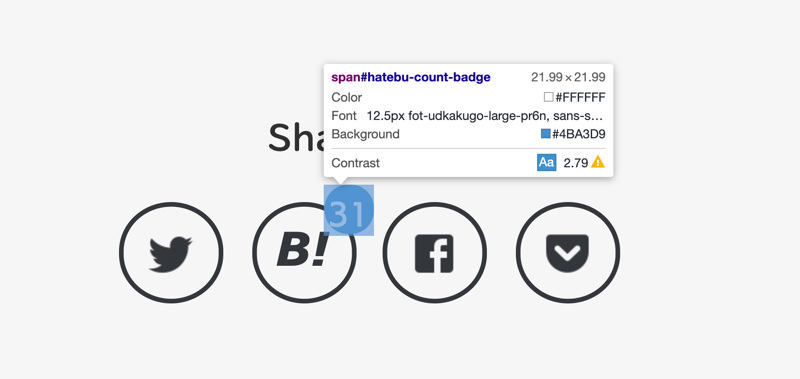
ちなみに上のスクリプト内で指定している ID atebu-count-badge は、このブログの各記事下に置いている SNS 用シェアボタンのこの部分になります。

表示する場所については適宜場所を作って表示してください。
まとめ
Hugo で作成したブログの各記事内に、はてなブックマークのブクマ件数を表示させてみた話でした。
静的サイトのメリットは何と言ってもロードの速さなのでなので、ブクマ件数についてもあらかじめ静的なファイルで生成しておこうというのが今回のポイントです。
もし同じような思いを持っている方がいれば、参考にしてみてください。また、Hugo に限らず静的サイトで既にブクマ数の表示をされている方がいれば、その方法についても知りたいなーという思いです。