GitHub CLI 1.0 がリリースされたので一通り触ってみる
2020-09-18今年のはじめ頃に登場した GitHub CLI のバージョン 1.0 がリリースされました。 issue とか PR の操作ができるみたいなので試してみます。
目次
GitHub CLI 1.0 is now available
これまでの最新バージョンは 0.12.0 でしたが、先日 1.0.0 がリリースされました。
使ってみる
では、早速使ってみます。
今回は、インストールから実際のコマンド実行 (Repository 、 Issue 、 Pull Request に関する操作) までやってみます。
インストール
macOS の場合、 Homebrew または MacPorts でインストールできます。今回は Homebrew でインストールします。
$ brew install gh
...
==> Summary
🍺  /usr/local/Cellar/gh/1.0.0: 60 files, 16.2MB
バージョンを確認します。
$ gh --version
gh version 1.0.0 (2020-09-16)
https://github.com/cli/cli/releases/tag/v1.0.0
ヘルプ確認
--help オプションでヘルプを確認できます。
$ gh --help
Work seamlessly with GitHub from the command line.

USAGE
  gh <command> <subcommand> [flags]

CORE COMMANDS
  gist:       Create gists
  issue:      Manage issues
  pr:         Manage pull requests
  release:    Manage GitHub releases
  repo:       Create, clone, fork, and view repositories

ADDITIONAL COMMANDS
  alias:      Create command shortcuts
  api:        Make an authenticated GitHub API request
  auth:       Login, logout, and refresh your authentication
  completion: Generate shell completion scripts
  config:     Manage configuration for gh
  help:       Help about any command

FLAGS
  --help      Show help for command
  --version   Show gh version

EXAMPLES
  $ gh issue create
  $ gh repo clone cli/cli
  $ gh pr checkout 321

ENVIRONMENT VARIABLES
  See 'gh help environment' for the list of supported environment variables.

LEARN MORE
  Use 'gh <command> <subcommand> --help' for more information about a command.
  Read the manual at https://cli.github.com/manual

FEEDBACK
  Open an issue using 'gh issue create -R cli/cli'
各コマンドについても、 --help オプションで詳細を確認できます。例えば issue に関するコマンドのヘルプは次のような内容になってます。
$ gh issue --help
Work with GitHub issues

USAGE
  gh issue <command> [flags]

CORE COMMANDS
  close:      Close issue
  create:     Create a new issue
  list:       List and filter issues in this repository
  reopen:     Reopen issue
  status:     Show status of relevant issues
  view:       View an issue

FLAGS
  -R, --repo OWNER/REPO   Select another repository using the OWNER/REPO format

INHERITED FLAGS
  --help   Show help for command

ARGUMENTS
  An issue can be supplied as argument in any of the following formats:
  - by number, e.g. "123"; or
  - by URL, e.g. "https://github.com/OWNER/REPO/issues/123".

EXAMPLES
  $ gh issue list
  $ gh issue create --label bug
  $ gh issue view --web

LEARN MORE
  Use 'gh <command> <subcommand> --help' for more information about a command.
  Read the manual at https://cli.github.com/manual
ログイン
各コマンド (サブコマンド) を実行するためには GitHub アカウントでログインする必要があります。ログインには gh auth login コマンドを実行し、対話形式でログインを進めていきます。
アカウントの種類
GitHub.com または GitHub Enterprise を選択します。今回は GitHub.com アカウントでログインします。
? What account do you want to log into?  [Use arrows to move, type to filter]
> GitHub.com
  GitHub Enterprise Server
ログインの方法
ログイン方法として、ブラウザを使用するか、認証トークンを入力するかを選択します。今回はブラウザを使います。
? How would you like to authenticate?  [Use arrows to move, type to filter]
> Login with a web browser
  Paste an authentication token
ブラウザを選択すると、ワンタイムコードが表示されるのでコピーします。 Enter キーを押すとブラウザでコード入力画面が表示されます。
! First copy your one-time code: EFD5-CC5F
- Press Enter to open github.com in your browser...
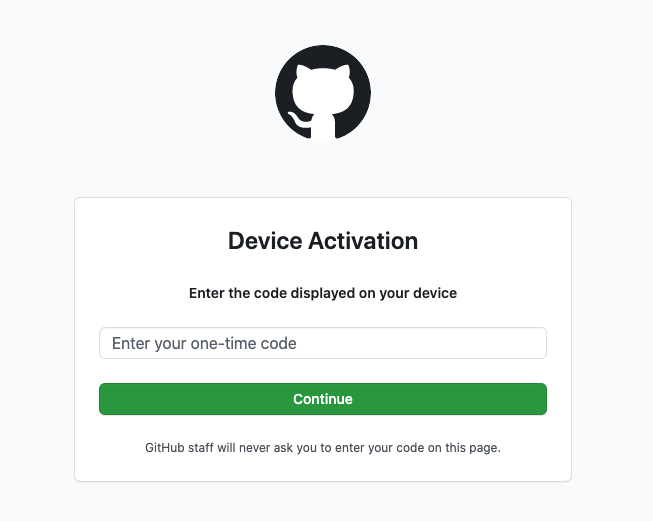
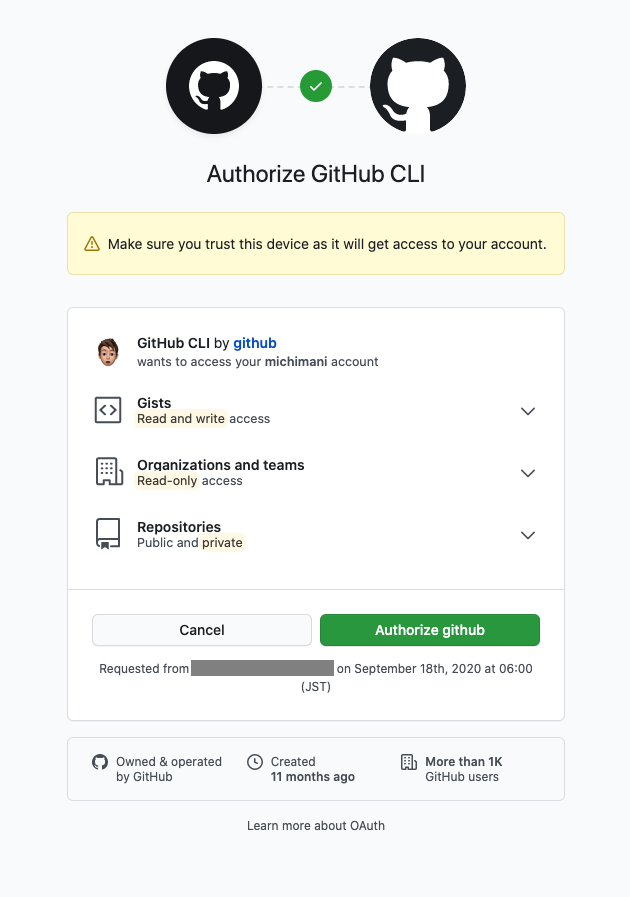
コードを入力すると認証画面が表示されるので、認証します。
デフォルトプロトコル
リポジトリにアクセスする際のデフォルトプロトコルを選択します。今回は SSH を選択します。
? Choose default git protocol  [Use arrows to move, type to filter]
  HTTPS
> SSH
以上でログインは完了です。
✓ Logged in as michimani
試しにサブコマンドのヘルプを確認してみます。
$ gh issue create --help
Create a new issue

USAGE
  gh issue create [flags]

FLAGS
  -a, --assignee login   Assign people by their login
  -b, --body string      Supply a body. Will prompt for one otherwise.
  -l, --label name       Add labels by name
  -m, --milestone name   Add the issue to a milestone by name
  -p, --project name     Add the issue to projects by name
  -t, --title string     Supply a title. Will prompt for one otherwise.
  -w, --web              Open the browser to create an issue

INHERITED FLAGS
      --help              Show help for command
  -R, --repo OWNER/REPO   Select another repository using the OWNER/REPO format

EXAMPLES
  $ gh issue create --title "I found a bug" --body "Nothing works"
  $ gh issue create --label "bug,help wanted"
  $ gh issue create --label bug --label "help wanted"
  $ gh issue create --assignee monalisa,hubot
  $ gh issue create --project "Roadmap"

LEARN MORE
  Use 'gh <command> <subcommand> --help' for more information about a command.
  Read the manual at https://cli.github.com/manual
Repository - repo
repo コマンドではリポジトリに関する操作を実行できます。
$ gh repo --help
Work with GitHub repositories

USAGE
  gh repo <command> [flags]

CORE COMMANDS
  clone:      Clone a repository locally
  create:     Create a new repository
  fork:       Create a fork of a repository
  view:       View a repository
create
まずは create サブコマンドでリポジトリを作成してみます。
$ gh repo create sandbox-repo \
--description "This is a sandbox repository." \
--public

? This will create 'sandbox-repo' in your current directory. Continue?  Yes
✓ Created repository michimani/sandbox-repo on GitHub
? Create a local project directory for michimani/sandbox-repo? No
実行すると、本当に作ってもよいか確認されるので Y で続けます。
次に、ローカルにプロジェクトディレクトリを作るか聞かれます。今回は作りません。 (あとで clone を試すので)
clone
動作は git clone と同じです。
$ gh repo clone michimani/sandbox-repo
Cloning into 'sandbox-repo'...
warning: You appear to have cloned an empty repository.

$ cd sandbox-repo
$ git remote -v
origin	git@github.com:michimani/sandbox-repo.git (fetch)
origin	git@github.com:michimani/sandbox-repo.git (push)
ログイン時にデフォルトプロトコルに SSH を選択したので、リモートリポジトリの URL も SSH のものになっています。
clone したら、とりあえず README.md だけ作成して push しておきます。
view
view サブコマンドでは、指定したリポジトリの説明、 README の内容を確認できます。
$ gh repo view michimani/sandbox-repo
michimani/sandbox-repo
This is a sandbox repository.


   sandbox-repo

  This is a sandbox.


View this repository on GitHub: https://github.com/michimani/sandbox-repo
-w または --web オプションを付けると、リポジトリのページをブラウザで開きます。
Issue - issue
issue コマンドでは Issue に関する操作を実行できます。
$ gh issue --help
Work with GitHub issues

USAGE
  gh issue <command> [flags]

CORE COMMANDS
  close:      Close issue
  create:     Create a new issue
  list:       List and filter issues in this repository
  reopen:     Reopen issue
  status:     Show status of relevant issues
  view:       View an issue
create
まずは create サブコマンドで issue を作成します。
$ gh issue create \
--title "The first issue" \
--body "This is the first issue"

Creating issue in michimani/sandbox-repo

https://github.com/michimani/sandbox-repo/issues/1
ちなみに、プロジェクトディレクトリ以外で上記のコマンドを実行すると fatal: not a git repository (or any of the parent directories): .git というエラーになります。
list
list サブコマンドで issue の一覧を表示します。
$ gh issue list

Showing 1 of 1 open issue in michimani/sandbox-repo

#1  The first issue    about 2 minutes ago
下記のオプションでフィルタリングできます。
| オプション | フィルタ対象 |
|---|---|
| -a, –assignee string | Filter by assignee |
| -A, –author string | Filter by author |
| -l, –label strings | Filter by labels |
| –mention string | Filter by mention |
| -m, –milestone number | Filter by milestone number or title |
| -s, –state string | Filter by state: {open|closed|all} (default “open”) |
view
view サブコマンドで issue の詳細を表示します。
$ gh issue view 1
The first issue
Open • michimani opened about 8 minutes ago • 0 comments


  This is the first issue


View this issue on GitHub: https://github.com/michimani/sandbox-repo/issues/1
表示されるのは issue のタイトルと説明です。
-w または --web オプションを付けるとブラウザで issue のページを開きます。
status
status サブコマンドでは、リポジトリの 自分にアサインされた issue 、 自分にメンションされた issue 、 オープンな issue を表示します。
$ gh issue status

Relevant issues in michimani/sandbox-repo

Issues assigned to you
  #2  The second issue    less than a minute ago

Issues mentioning you
  There are no issues mentioning you

Issues opened by you
  #2  The second issue    less than a minute ago
  #1  The first issue     about 6 minutes ago
close
close サブコマンドで issue を close します。
$ gh issue close 1
✔ Closed issue #1 (The first issue)
close された issue の一覧を確認してみます。
$ gh issue list --state closed

Showing 1 of 1 issue in michimani/sandbox-repo that matches your search

#1  The first issue    about 1 minute ago
Pull Request - pr
pr コマンドでは Pull Request に関する操作を実行できます。
$ gh pr --help
Work with GitHub pull requests

USAGE
  gh pr <command> [flags]

CORE COMMANDS
  checkout:   Check out a pull request in git
  checks:     Show CI status for a single pull request
  close:      Close a pull request
  create:     Create a pull request
  diff:       View changes in a pull request
  list:       List and filter pull requests in this repository
  merge:      Merge a pull request
  ready:      Mark a pull request as ready for review
  reopen:     Reopen a pull request
  review:     Add a review to a pull request
  status:     Show status of relevant pull requests
  view:       View a pull request
create
まずは create サブコマンドで Pull Request を作成します。
$ gh pr create \
--base master \
--head sample-pr \
--title "The first PR" \
--body "This is the first pull request."

Creating pull request for sample-pr into master in michimani/sandbox-repo

https://github.com/michimani/sandbox-repo/pull/3
--head で指定するブランチは、デフォルトで現在の作業ブランチが指定されるので省略可能です。
list
list サブコマンドで Pull Request の一覧を表示します。
$ gh pr list

Showing 1 of 1 open pull request in michimani/sandbox-repo

#3  The first PR  sample-pr
下記のオプションでフィルタリングできます。
| オプション | フィルタ対象 |
|---|---|
| -a, –assignee string | Filter by assignee |
| -B, –base string | Filter by base branch |
| -l, –label strings | Filter by labels |
| -s, –state string | Filter by state: {open|closed|merged|all} (default “open”) |
diff
diff サブコマンドで Pull Request の差分を表示します。
$ gh pr diff 3
diff --git a/README.md b/README.md
index 759b875..e696948 100644
--- a/README.md
+++ b/README.md
@@ -3,3 +3,5 @@ sandbox-repo

 This is a sandbox.

+1. hoge
+
review
review サブコマンドでは、 Pull Request に対してレビュー (コメント) をすることができます。
$ gh pr review 3 \
--body "This is a review comment" \
--comment

- Reviewed pull request #3
--comment の代わりに --approve または --request-changes を指定すれば、変更要求、承認をすることができます。自分自身が作成した Pull Request に対しては --comment のみ使えます。
$ gh pr review 3 \
--body "This is a approve comment" \
--approve
failed to create review: Can not approve your own pull request
merge
merge サブコマンドで Pull Request をマージします。
$ gh pr merge 3 \
--squash
✔ Squashed and merged pull request #3 (The first PR)
✔ Deleted branch sample-pr and switched to branch master
マージの方法はそれぞれ下記のコマンドで指定します。
| オプション | マージ方法 |
|---|---|
| -m, –merge | Merge the commits with the base branch |
| -r, –rebase | Rebase the commits onto the base branch |
| -s, –squash | Squash the commits into one commit and merge it into the base branch |
マージ元のブランチはマージ後に削除されるので、もし削除したくない場合は --delete-branch=false を指定します。
view
view サブコマンドでは Pull Request の概要 (タイトル、説明、ステータス) を確認できます。
$ gh pr view 3
The first PR
Merged • michimani wants to merge 1 commit into master from sample-pr


  This is the first pull request.


View this pull request on GitHub: https://github.com/michimani/sandbox-repo/pull/3
まとめ
GitHub CLI のバージョン 1.0 がリリースされたので、普段から使いそうなコマンドについて試してみた話でした。
各コマンド、サブコマンドについては --help オプションで詳細を確認できます。コマンドやオプションもシンプルなので、コマンドやオプションの詳細に関してはヘルプを見ればほぼほぼわかります。
ローカルで作業しているディレクトリにある .git を元にしてコマンド実行対象のリポジトリが判定されるので、ローカルから作業ブランチを Push 、そのままローカルのターミナルから Pull Request の作成までできるのは便利だなと思いました。
AWS と違って GitHub は GUI が頻繁に変わるようなことはないですが、 CLI で操作できればだいぶ作業を効率化できそうです。
comments powered by Disqus